Wednesday, January 10, 2007

Floating a Quilt

There is no root beer for this float. HeeHaw !

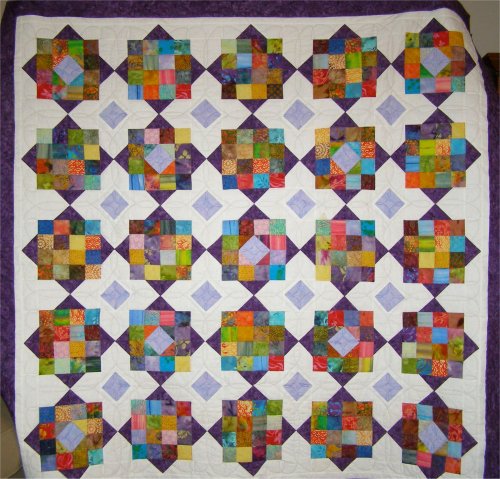
This is about loading a quilt on a longarm quilting machine. If a quilt top is floated, it is basted at the top of the quilt and the bottom is flapping loose. That is, the quilt top is not attached to a zipper, roller or the backing until the quilt has been quilted and advanced to the bottom. Here is picture of a floated quilt.


Good practices:If you are going to sew, use your clamps. Clamps are attached to the backing only. The backing should not pull severely when clamped.

Terminology: ( you said you only have 3 rollers so you do not have a leveling roller)

Take-Up roller is at the back of the machine. It is the one "inside" the throat of the machine. Your quilt backing
will be zipped onto this roller. Your entire quilt will be 'taken up' on this roller

Belly roller is the one that touches your belly from the front of the machine. The bottom of your quilt backing will be rolled onto this roller.

The middle roller will hold the zippered bottom of the quilt top unless you float your quilt.

Full float means no zippers are used on the quilt top.

Zippers.... you will love them once you get the procedure down.

I float my quilt top so I don't use the zipper marked "quiltop bottom left". Before I began floating my quilts, I would baste (or pin) the bottom of the quilt top to the third zipper half also using my Domestic Sewing Machin (DSM).

Then I carry the pieces to my longarm.
-Zip the backing onto the take-up and belly rollers (top and bottom)

-Roll the backing onto the belly roller smoothing out puckers and wrinkles. Leave some slack in backing. The back-side of the backing should be face up.

- Zip the bottom of the quilt top onto the middle roller. Roll it completely onto the roller to keep it out of the way for now. (Skip this step for a full float).

-Place the batting on top of the quilt backing as close to the top of the backing as you can get it. You may want to pin it every 6". You will be basting this batting on so do not pin close to the top. With the top of the batting pinned to the top of the of the backing, smooth the batting along the width of the quilt and finesse the batting between the middle roller and the belly roller. Smooth it gently. The batting (and quilt top if floated) drapes over the belly roller and falls to the floor (depending on length; it is loose).

Tighten the belly roller carefully smoothing the batting on top too and set the brake (right front) on the belly roller. Do not make this tight or you will break thread when you quilt. You're not supposed to be able to bounce a quarter off the quilt

-Slowly baste the batting to the backing. Remove the pins from the batting/backing. Release the brake.

- Lay the quilt top (pretty side up) (unroll from the middle roller if you used zipper) carefully onto the already basted top edge of the backing/batting. Pin the quilt top about every 6" like you did the batting. Tighten the belly roller again smoothing the 3 layers and set the brake. Now baste the quilt top onto the backing/batting at the top near the take-up roller. Remove the pins.

The reason I float my quilts is I was finding bunny ears or stretched corners on the bottom of my quilts when I used the zippers on the bottom of the quilt top. The quilting process shrinks or pulls in the quilt as you quilt it. Then when you get to the bottom and the bottom of the quilt top is nailed to the zipper, there can be no pulling in there so it does not seem to match the rest of the quilt. It's really just matter of preference. I'm sure there is a way to use the zipper without the bunny ears, I just don't know what it is.
You are now ready to start quilting. By the way, don't forget to have fun.

Sunbonnet Sues

How sweet is this quilt?

Cathy made this quilt. It was her first go at embroidered kit work. The little Sue's blocks pattern in the kit is printed using blue ink on white fabric. Cathy did a great job on the embroidery but then she got turned around on where to cut the blocks. The whole block sizing scheme is too complex for me. Anyway, she just widened the sashing to compensate for the smaller blocks. I also noticed that some ofhte blue ink was getting wicked, up into the thread.That was a bit scary. But I was told that the blue would wash right out.


I wanted to use white or natural thread to echo inside the Sue-blocks. The sashing and borders were a turquoise print. That turquoise print was also used as the sides on the piececd back along with a pink flannel with multi-colored dots. I needed to use aqua thread on the back to go with the Superiod Ing Tut DeNile thread to be used on the sashing and borders on the front. I was afraid that I would get pokeys of blue pulling thru to the front in the Sue blocks. My solution for that was to put in 2 pieces of batting. The first was a thin Warm & Natural cotton laid on top of the backing. Then a layer of Warm & Natural Soft & Bright poly batting was placed on top of the cotton batt. Then the quilt top on top of all that. It worked. NO POKEYS in the white Sue blocks.

I was very pleased with it and so was Cathy. I love trying new things.

And this is what it looked like.


And the detail on the block:


And the back:

Tuesday, January 09, 2007

Garden Window

It is supposed to feel like you are looking out of the window into your garden.

This quilt pattern is by Liz Porter, right out of the July/August 2006 Fons & Porter's Love of Quilting magazine.

http://www.fonsandporter.com

It is supposed to be 84 x 101 but I want to use it on my Kingsize bed and I want a nice drop. Liz's pattern calls for 2 large print florals, one light and one medium. I could not find any big florals in 'light' that I liked. So I got this big orange floral with some blue accents. I picked up the blue accents from the orange and used a blue Fusions print as the other side of my 7 inch half square triangle. The pattern is pretty simple but after 3 rows, I got so excited when I started to see the pattern take shape on the design wall.

I am completely clueless about how to quilt it. I want to follow the garden view with maybe, diagonal feathers, but an all-over with Baptist Fans would also look nice, too

Twirling Stars


On the machine and in progress. I decided this one needed the "full float" so
no bunny ears on the corners
I love the stars in this quilt top. They look a bit like Ohio Stars but the points are different. The quilt is mostly white with blue and white florals in the 9-patches and stars. The back is white muslin. It belongs to an avid quilter with the endearing grandmother's nickname of Mema; well, her real name is Betty but almost everybody calls her Mema. She is certainly not old enough to be my grandmother, though.


I planned to use white thread on it but it almost 'glowed' when I puddled it onto the quilt. So I tried Signature's cotton thread color Parchment. It looked great. So Parchment it is with prewounds bobbins of Parchment from Signature.

Mema had planned to quilt the top herself and had already marked it for cross hatching. Then she saw a quilt I had done with cross hatching at the local quilt shop and decided to give it to me. The markings look like pencil, I sure hope they come out.

I struggled with what else to put in there. The on-point pattern is done in rows. That is, one whole row is 9 patches followed by a row of twirling stars, etc. I think it would have had more interest if the blocks had been alternating. I found a motif that looks great for the stars. So if I put a motif in the stars, there will be an entire row of that motif. I don't want to use different motifs in each star to make it more interesting because I think that will clutter up what is a very serene quilt top.

I found a sweet little rose stencil for the setting triangles. And I plan to use some simple feathers around the corners interspersed with the cross hatching. I do not plan to use any SID; I think that would make it too blocky. I want the cross
hatch to flow as much as possible from the edge, thru the feather border, thru the rose setting triangle, past the star and into the 9-patches. I have it in my mind how I want it. Now I just need to translate that to the longarm.

My life has changed in the last couple of years - some bumps, I retired from quilting, and then I moved to Texas. I'm anxious to see what new adventures await me in the next phase of my life.

About Me

My photo
Ramona, California, United States
I started quilting when a quilt shop opened in our little town in January 2004. I have been hooked ever since.

Blog Archive

Followers of my blog

Books I"ve read lately

  • The Help (Kindle)
  • The Appeal by John Grisham
  • Secret Life of Bees by Sue Monk Kidd
  • Water for Elephants by Sara Gruen
  • To Kill a Mockingbird (again) by Harper Lee
  • Bleachers by John Grisham

This is called Fruit Cocktail

This is called Fruit Cocktail
It is all batiks